数据集及方法简介
μ-RegPro挑战赛旨在提供经过良好整理、同时保留真实临床特征的数据。该数据包含一百余对MR和TRUS图像,并由在该应用领域拥有十五年以上经验的研究人员和临床医生进行认真标注。
其数据结构为
训练集
train
|---us_images
  |---case000000.nii.gz
  |---case000001.nii.gz
   ……
  |---case0000064.nii.gz
|---us_labels
  |---case000000.nii.gz
  |---case000001.nii.gz
   ……
  |---case0000064.nii.gz
|---mr_images
  |---case000000.nii.gz
  |---case000001.nii.gz
   ……
  |---case0000064.nii.gz
|---mr_labels
  |---case000000.nii.gz
  |---case000001.nii.gz
   ……
  |---case0000064.nii.gz
验证集
val
|---us_images
  |---case0000065.nii.gz
   ……
  |---case0000072.nii.gz
|---us_labels
  |---case0000065.nii.gz
   ……
  |---case0000072.nii.gz
|---mr_images
  |---case0000065.nii.gz
   ……
  |---case0000072.nii.gz
|---mr_labels
  |---case0000065.nii.gz
   ……
  |---case0000072.nii.gz
测试集
test(holdout)
|---us_images
   |---case000073.nii.gz
   |---case000074.nii.gz
    ……
   |---case000107.nii.gz
|---us_labels
   |---case000073.nii.gz
   |---case000074.nii.gz
    ……
   |---case000107.nii.gz
|---mr_images
   |---case000073.nii.gz
   |---case000074.nii.gz
    ……
   |---case000107.nii.gz
|---mr_labels
   |---case000073.nii.gz
   |---case000074.nii.gz
    ……
   |---case000107.nii.gz
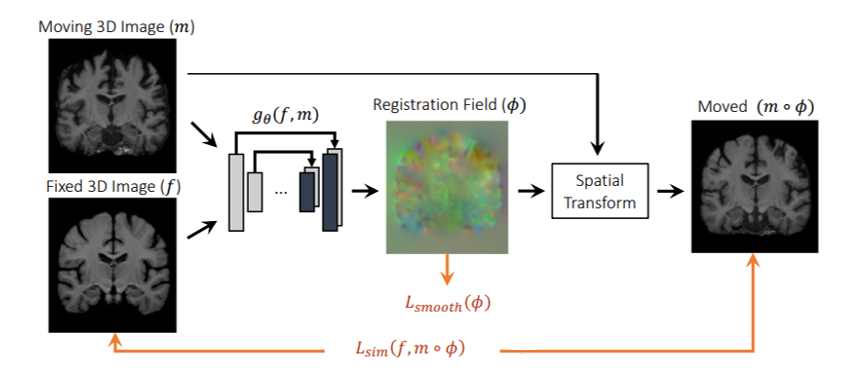
VoxelMorph是第一个将神经网络应用到配准任务上的算法,且是无监督训练,输入为fixed image和moving image,输出为moved image。网络输出为稠密形变场(dense deformation field,DDF),将DDF应用到moving image上即可得到moved image。损失函数由两部分组成,一部分是fixed image和 moved image的相似性度量,另一部分是对DDF的平滑约束。其方法流程图如图1所示。
VoxelMorph方法于2019年提出,μ-RegPro是2023年的MICCAI挑战赛,其中一个baseline是VoxelMorph,但是使用的是TensorFlow版。而直至2026年,VoxelMorph经过了多次修改,发布了多个分支,主分支为PyTorch版。VoxelMorph的TensorFlow版有单独的分支,是dev-tensorflow。
为复现其效果,并为后续PyTorch版代码迁移做准备,写下本文章。
环境部署及训练
首先需要准备代码运行环境,默认已经装好N卡显卡驱动、CUDA和conda环境。
1.确认显卡驱动版本及支持的CUDA版本,我所使用的环境最高支持CUDA 13.0版本。
nvidia-smi
2.创建conda环境并激活,然后升级pip版本。
conda create -n voxelmorph_tf python=3.10 -y
conda activate voxelmorph_tf
python -m pip install --upgrade pip
3.安装TensorFlow GPU版和常用依赖
pip install "tensorflow[and-cuda]==2.15.0"
pip install joblib scikit-image==0.20.0 nibabel==5.1.0 matplotlib==3.7.1
4.克隆VoxelMorph的dev-tensorflow分支,将其命名为voxelmorph_tf,进入目录并安装setup.py里的依赖
git clone -b dev-tensorflow --single-branch https://github.com/voxelmorph/voxelmorph.git voxelmorph-tf
cd voxelmorph-tf
pip install -e .
5.验证tensorflow和VoxelMorph是否可用
python -c "import tensorflow as tf; print(tf.__version__); print(tf.config.list_physical_devices('GPU'))"
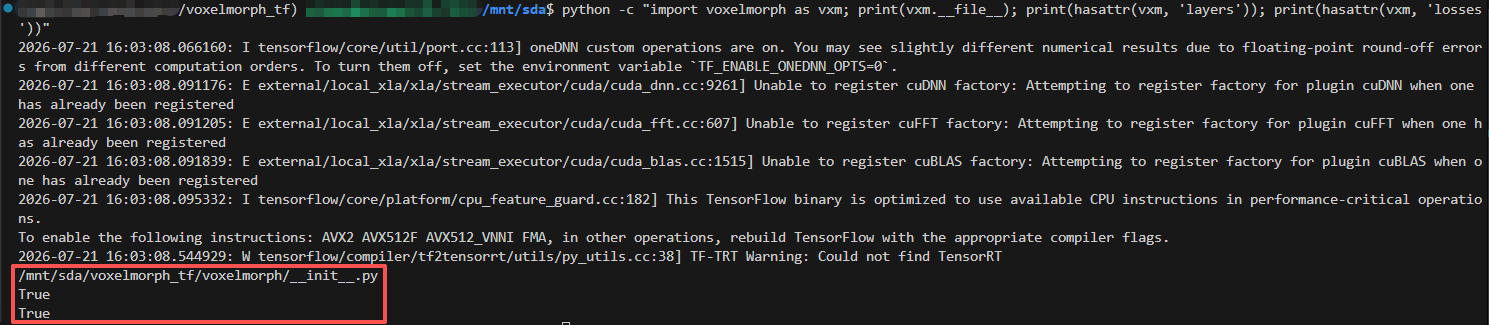
python -c "import voxelmorph as vxm; print(vxm.__file__); print(hasattr(vxm, 'layers')); print(hasattr(vxm, 'losses'))"
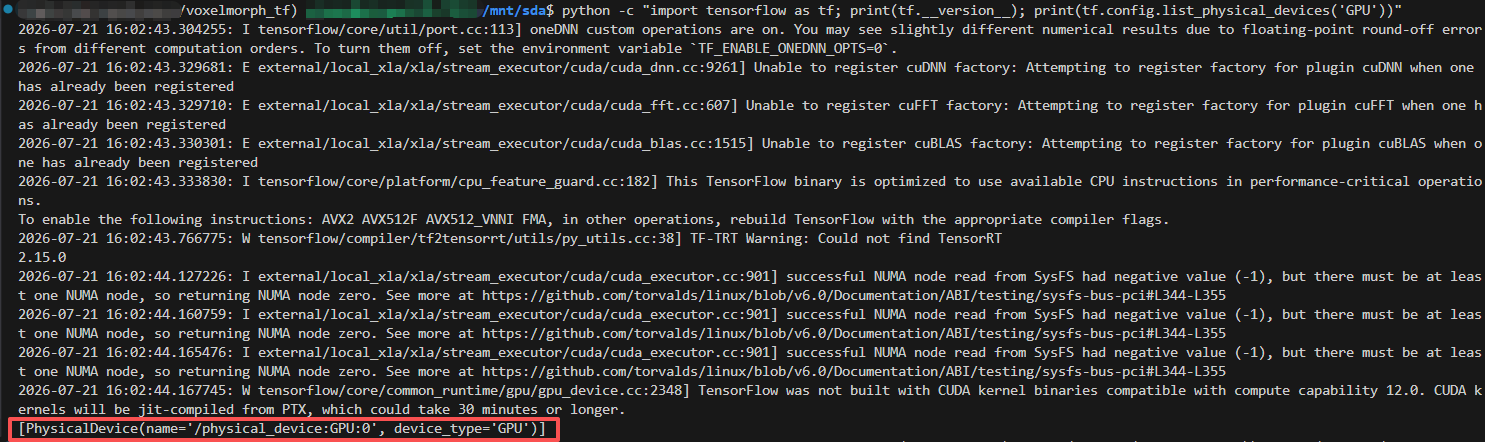
应该看到如图2、图3类似的结果
2.15.0
[PhysicalDevice(name='/physical_device:GPU:0', device_type='GPU')]
True
True
cd voxelmorph_rf
git clone https://github.com/muregpro/Baseline-Networks.git
7.下载数据集,数据集分为三个压缩包,解压后的数据目录应如开头所述内容一样。
mkdir -p dataset
cd dataset
wget -c -O train.zip "https://zenodo.org/records/8004388/files/train.zip?download=1"
wget -c -O val.zip "https://zenodo.org/records/8004388/files/val.zip?download=1"
wget -c -O test.zip "https://zenodo.org/records/19414481/files/holdout.zip?download=1"
unzip train.zip -d train
unzip val.zip -d val
unzip test.zip -d test
mv ./test/holdout/* ./test/
rm -r ./test/holdout
rm train.zip val.zip test.zip
8.修改代码,分别修改train_voxelmorph.py和evalution.py。
将train_voxelmorph.py第三行的
os.environ['CUDA_VISIBLE_DEVICES']='1'
改为前面测试实际输出的设备号,我的是0,因此改为
os.environ['CUDA_VISIBLE_DEVICES']='0'
将train_voxelmorph.py第68-70行的代码改为
f_path = r'../dataset/train'

val_path = r'../dataset/val'
evalution中第11行代码改为
val_path = r'../dataset/test'
9.进行训练
cd Baseline-Networks
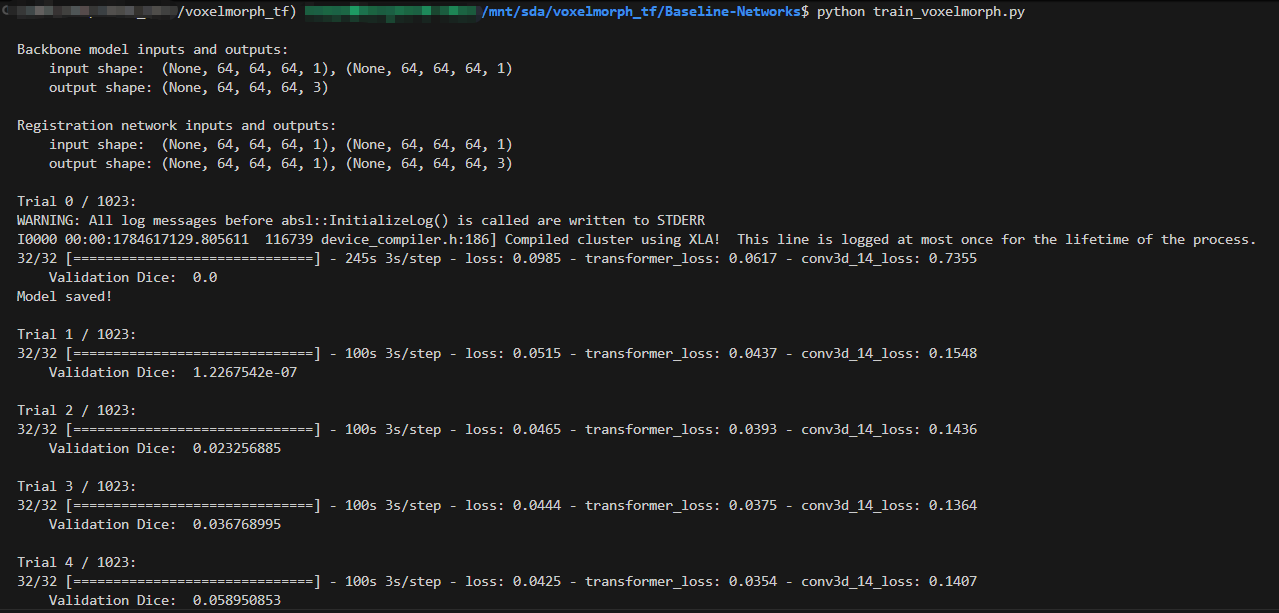
python train_voxelmorph.py
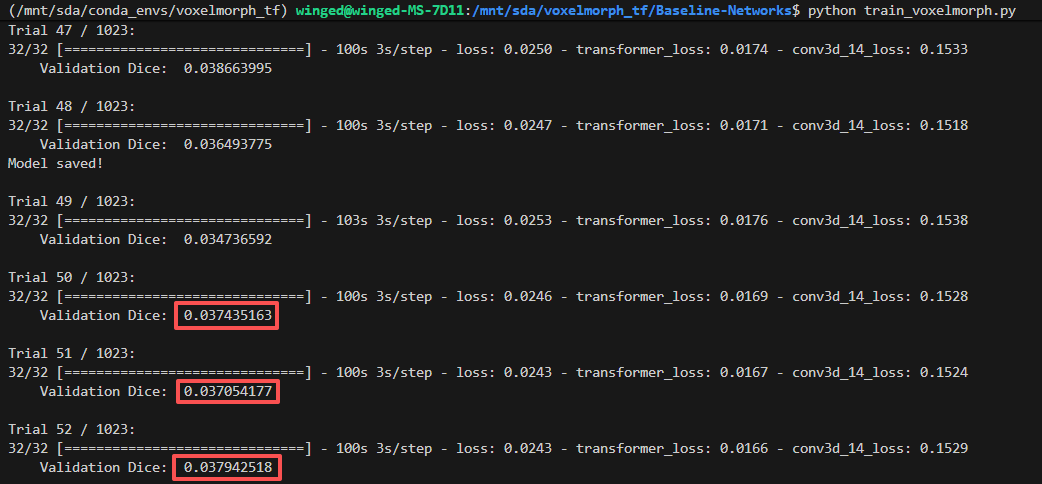
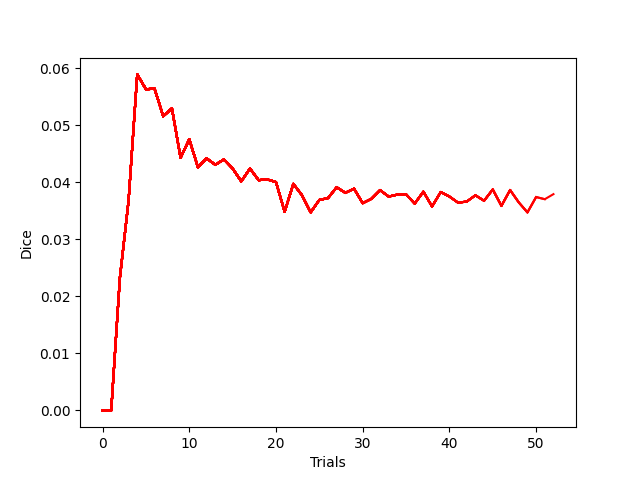
成功训练效果图如图4所示
遇到的问题及解决方案
1.NumPy 2.x 和旧编译包不兼容,报错
AttributeError: _ARRAY_API not found
ImportError: numpy.core.multiarray failed to import
原因:matplotlib 里的二进制扩展 _path 是按 NumPy 1.x ABI 编译的,所以导入 voxelmorph -> neurite -> matplotlib会出错。
解决方案:
pip uninstall -y numpy matplotlib
pip install "numpy==1.26.4"
2.TensorFlow版本问题,报错
from . import metrics
File "/mnt/sda/conda_envs/voxelmorph_tf/lib/python3.10/site-packages/neurite/tf/metrics.py", line 33, in <module>
from tensorflow.keras.losses import mean_absolute_error as l1
ImportError: cannot import name 'mean_absolute_error' from 'tensorflow.keras.losses'
原因:我最初安装tensorflow2.15.0版本的时候报错,因此直接安装的最新版。
pip install tensorflow[and-cuda]
但是neurite 在用旧 Keras 2 API,而tensorflow.keras 实际走的是新版 Keras 3 兼容层,新版没有这个接口,因此报错。
解决方案:
python -m pip uninstall -y tensorflow keras tf-keras tf_keras
python -m pip install --upgrade pip
python -m pip install "tensorflow[and-cuda]==2.15.0.post1"
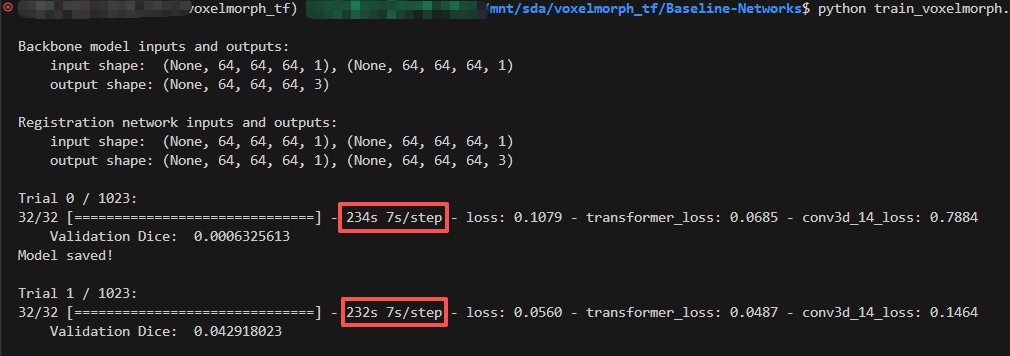
3.训练未使用GPU,而是使用CPU,训练速度慢,如图5所示。
解决方案:
查看GPU显存占用,
watch -n 1 nvidia-smi
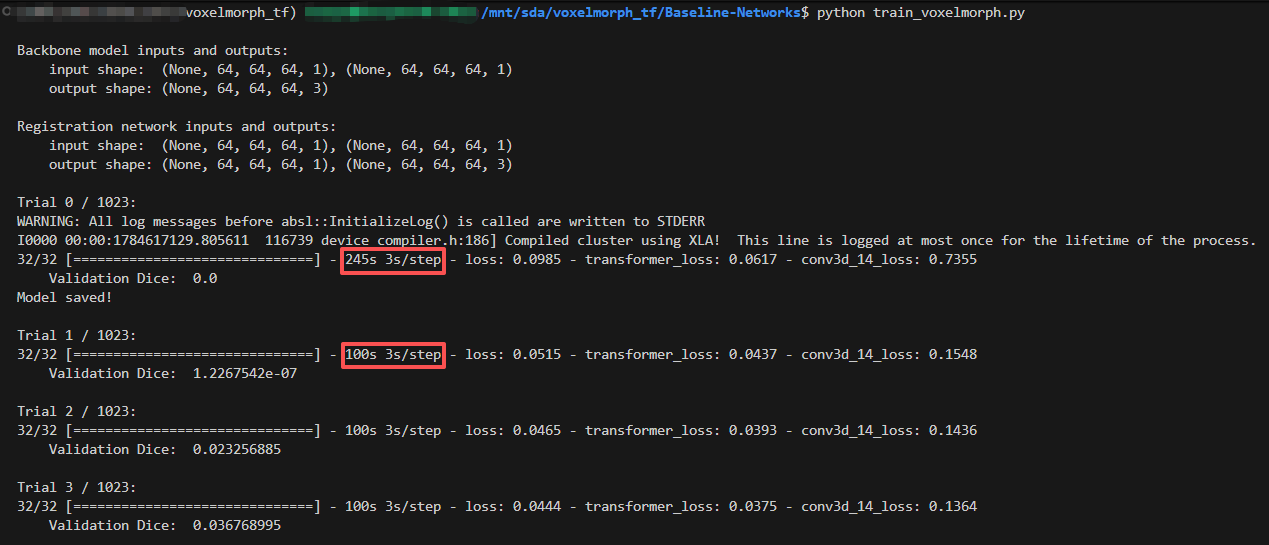
发现显存占用不高,近乎没有。想到可能是设备号设置问题,于是修改了train代码的第3行,修改之后速度提升,如图6所示。
nvidia-smi dmon
中的
sm   GPU 计算核心利用率
mem  显存带宽利用率
pwr  功耗
mclk 显存频率
pclk GPU 核心频率
发现sm和pwr时高时低。
分析得知整个过程中每个batch都需要在CPU上读 .nii.gz、解压、resize、归一化,GPU 只能等数据准备好以后做 Conv3D 和 SpatialTransformer,因此时间较长。且第一轮包含了XLA编译及部分初始化工作,因此时间较长,是正常现象,无需担心。
第二轮及之后的便恢复正常状态了,如图7所示。